Creating a Volume
To create a RAID volume, you use RAID Utility to format space available on a RAID set.
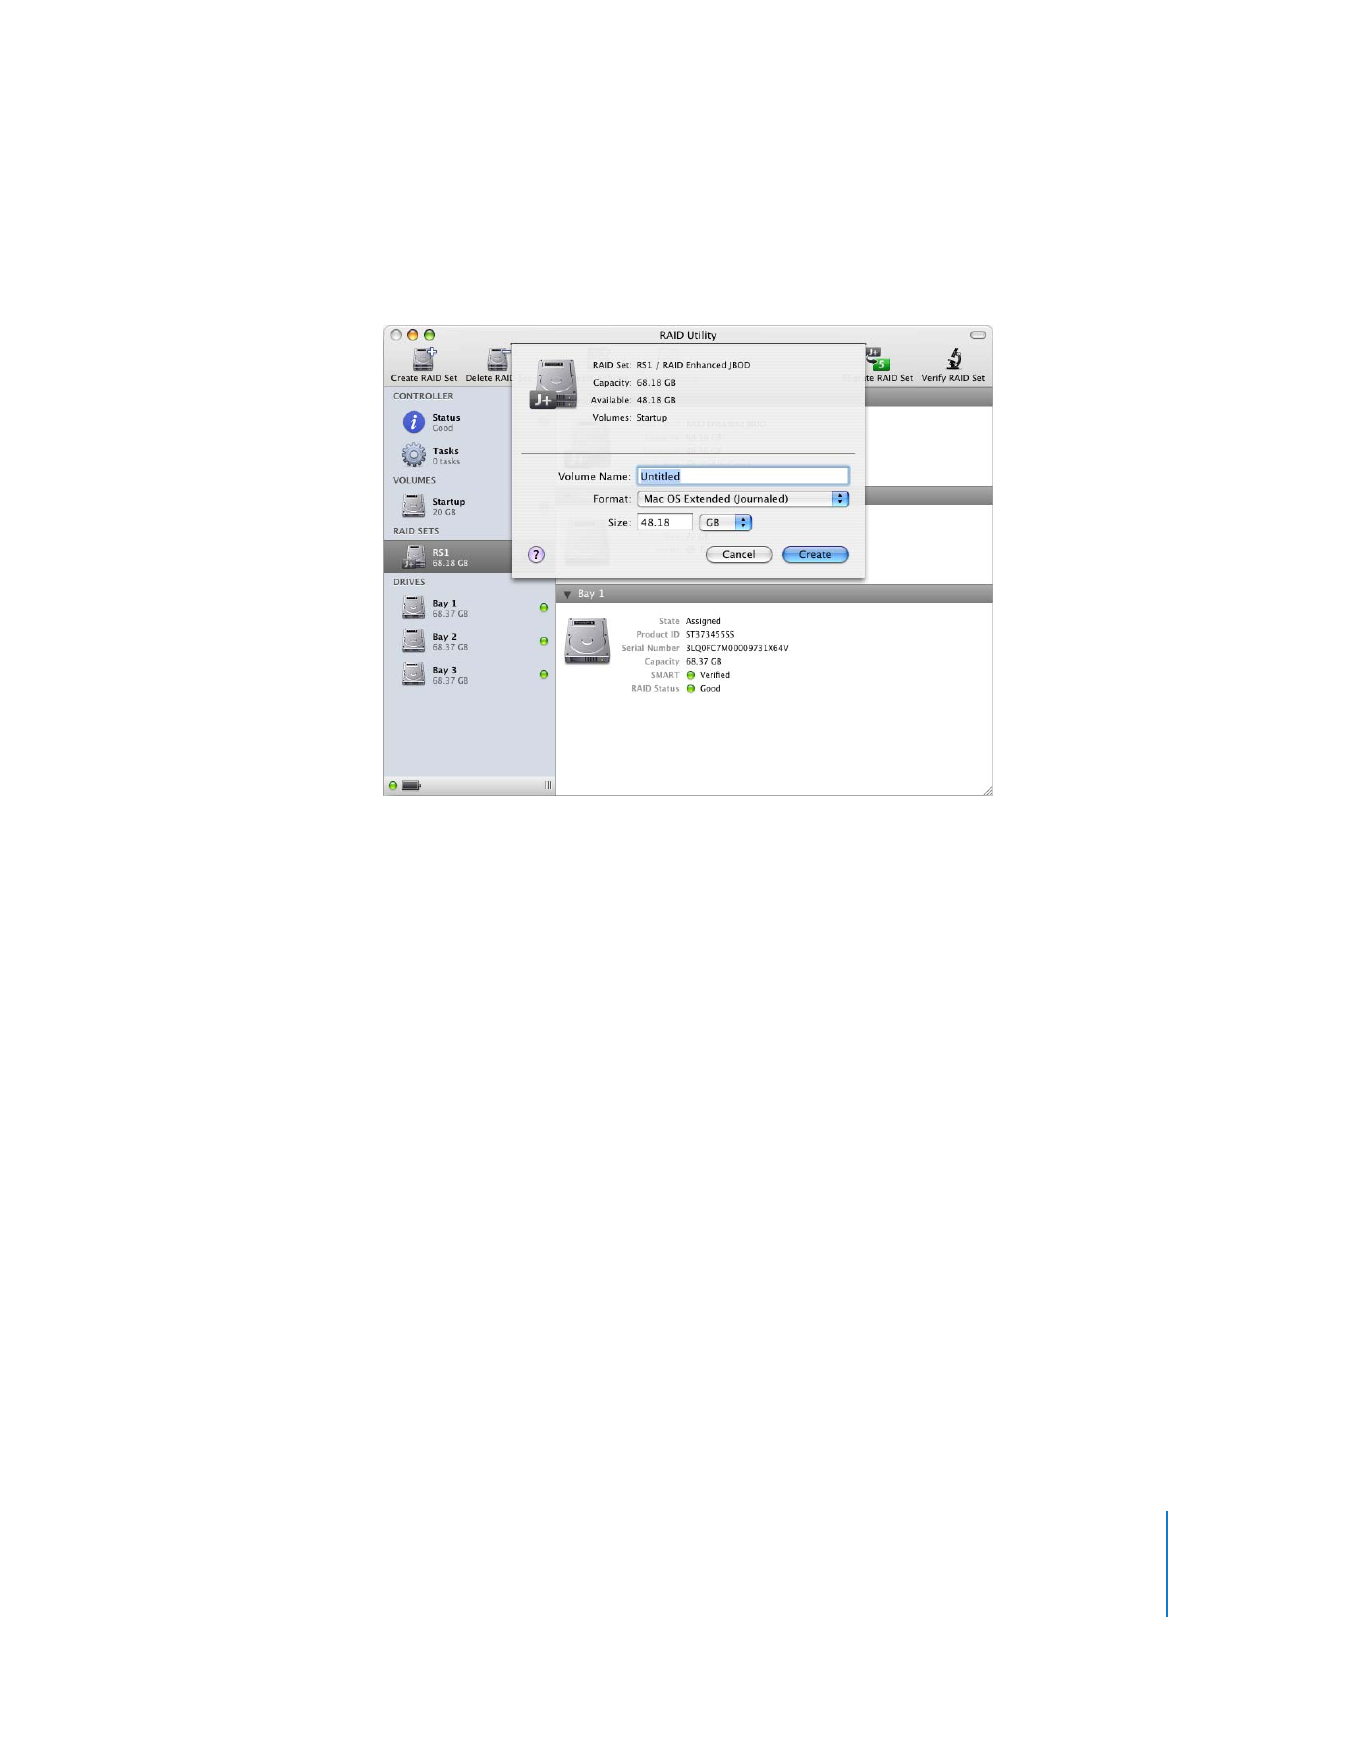
To create a volume:
1
In RAID Utility, select a RAID set in the left column and click Create Volume.
2
Type a name for the volume.
3
Choose a volume format from the pop-up menu.
If you’re not sure which format to use, choose Mac OS X Extended (Journaled).
4
Enter a size for the volume.
This is initially set to the size of the underlying RAID set, but you can enter a smaller
size and save the remaining space to create other volumes.
5
Click Create Volume.
You can start using the volume as soon as its icon appears in the Finder, but maximum
read and write performance isn’t available until the volume is completely initialized.
Until then, the volume status icon in RAID Utility is yellow. Initialization time depends
on the RAID level of the underlying RAID set. To check progress, click Tasks in the left
column of the RAID Utility window.

10